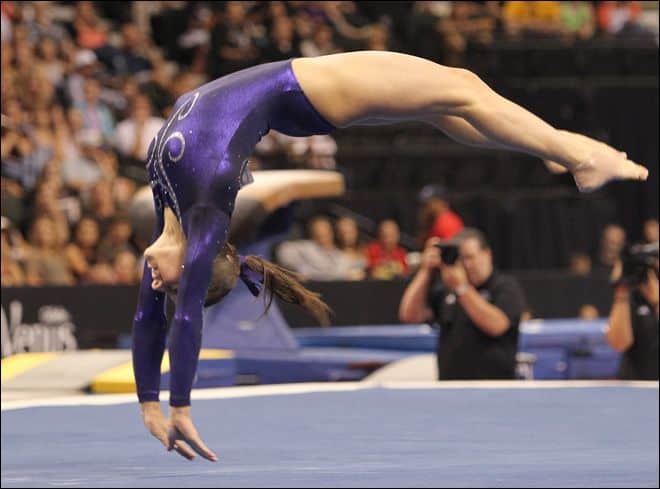
The back handspring is a skill that is a major milestone in a gymnast’s progress. A gymnast really wants to master the back handspring. Because it’s a skill that no gymnast has ever learned before, it can be difficult to master. A back handspring requires that a gymnast push and jump backward. It can also create a mental block. Although it is a difficult skill to master, it can be very fun and exciting once you have mastered your back handspring. These are the muscles that you will need, the drills that you should know, and the steps you can take to master your back handspring.
These back handsprings tips will help you improve your tumbling skills and allow you to progress to more challenging sequences. You can build your skills by learning the prerequisites for every skill. To make the back handspring more enjoyable, take the time to learn the prerequisites.
Variations on the Back Handspring
Combining it with other maneuvers immediately before or after a back handspring is the most common way to make it more varied. These are:
- Front handspring.
- Forward walkover
- To the back
- Additional back handsprings
The back handspring steps out is one standalone maneuver. This is where the gymnast spreads his legs after jumping and then lands on the other leg. It is not the same as a standard back handspring, where the legs remain together all the way through.
A front handspring step out refers to a similar variant on the core maneuver for a front handspring. It looks almost like a reverse-orientated back handspring.
Prerequisite Skills
It is important to be able to perform the following before you attempt a back handspring:
- Handstand: This requires a lot of upper body strength. You will also need to be able to square your shoulders, hips, and ankles while maintaining a straight, tight body. All these skills are essential for a great back handspring
- Back roll to do a handstand: This requires strength in the upper body and good form. This teaches you how to lie back and perform a tumbling / gymnastic skill.
- Bridge: This bridge allows you to support your body using your arms and shoulders while looking forward. It improves flexibility and strength. You can use the bridge in many different ways to increase strength and flexibility. You could, for example, extend your knees and put more weight on your arms. While on the bridge, you could try shrugging your shoulders or bending your elbows to do “pushups”.
How to Do a Back Handspring Step by Step
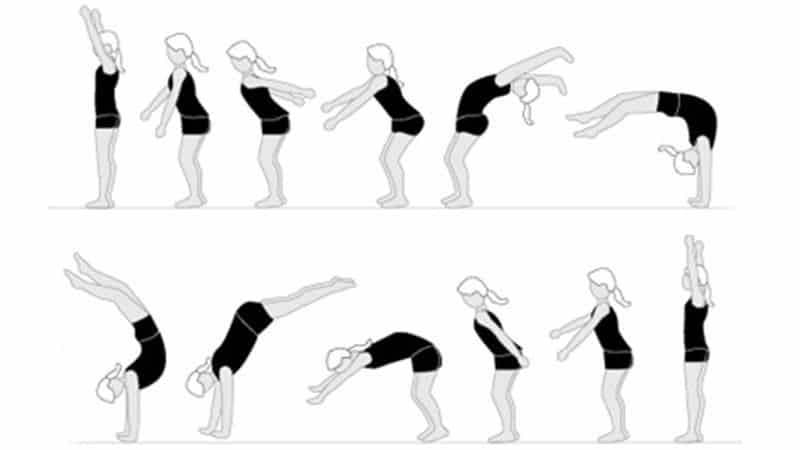
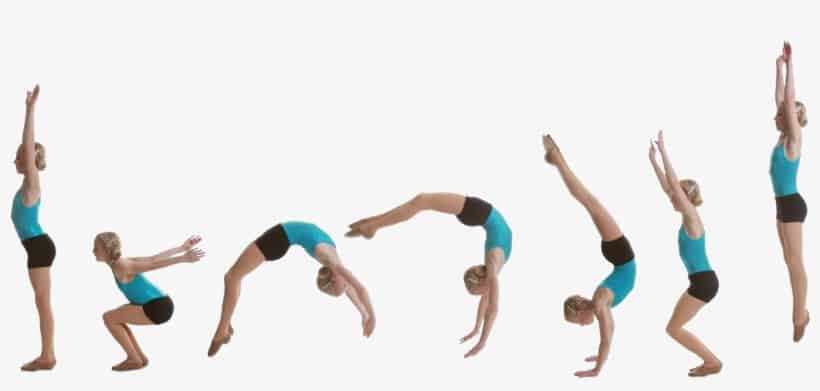
1. Sit, Lean, Push
This is where your legs are used to push the floor.
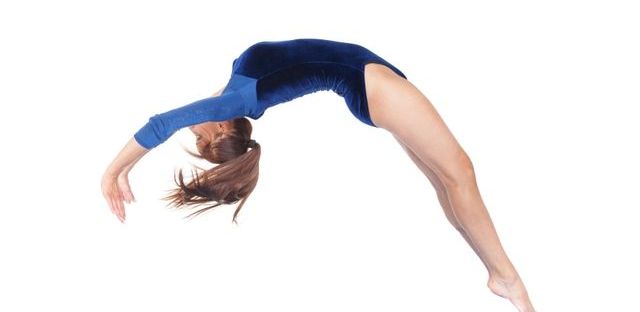
2. Tight Arch
3. Handstand with tight arch
You will use your arm strength and core strength to pull your legs up over your head.
4. Tight hollow position
You have lifted off the ground and moved from a tight arch position to a high hollow.
5. Landing
Standing back handsprings should be done with your feet under your hips. You should land your feet directly in front of your hips if you’re doing a back handspring in a connection.
Three Steps to perform a back handspring
A back handspring is composed of three elements: a starting, middle, and end.
- The beginning may be in neutral standing, but it is often part of a larger routine. It could come out of roundoff or whip back, salto element, or another back handspring.
- The middle section is the actual movement. It consists of a backflip, in which the hands touch the ground.
- In the end, the gymnast is in a standing position with his arms extended above his head (pressed against the ears).
The back handspring is a common technique that provides gymnasts with both backward and upward momentum. This helps them to move on to their next maneuver.
Five Tips for Back Handsprings
- Get a coach. Your friends and family may think they know a lot about back handsprings. However, your coach will have more experience and knowledge than you. Your coach will have more experience and training in working with athletes than you and your friends and can analyze your form more accurately than you. He will be able to tell you how to improve your technique, such as how to land better or how to bend your elbows. Your coach can spot you accurately, which will help prevent unnecessary injury.
- Learn how to sit back. You might be tempted to bend your knees and lean forward to do the back handspring. This will stop your momentum and throw off your movement. To perform the handspring, you will need to be comfortable sitting down. This can be done by practicing your back roll and sat back against a wall. Sit back against a wall by standing several feet from the wall. Your back should be facing the wall. Keep your torso straight and your knees bent while you keep your lower legs in place. You may feel like your going to fall if you sit back. However, when your knees meet at a 90-degree angle your back will catch the wall and “catch” it. To perform a handspring, you will need to be able to jump back from the “sit back”. Continue practicing the sit back position until it becomes natural.
- Practice the back handspring on the wedge mat. The decline of the wedge will help your body’s momentum to perform the skill correctly. You must learn how to keep an upright position.
- Maintain a straight torso. Some people may believe that the back handspring requires significant backward bends. While you may need to bend your back slightly when you reach behind your feet to the ground, your strong jump should generate enough movement for your arms to spring towards the floor. This will allow your back and spine to remain relatively straight.
- Make video recordings. Have your coach or parents record you practicing back handsprings. Then compare your recordings with videos of professional cheerleaders and gymnasts. You’ll see the correct form repeatedly and be able to observe your own form more often to find small changes that can make your form better.
You will need to have the following muscles for a back handspring:
Legs To do a back handspring, you need strong legs. This includes your quads and glutes. You can push your legs off the ground to do a back handspring, and then transfer it onto your hands so that you are in a handstand.
Shoulders and Arms: You will need strong shoulders and arms to do the middle portion of the back handspring. During the back handspring, you will need to use your arm and shoulder muscles to push against the ground in the handstand position. Then, you will “snap” to land on your feet with the chest up.
Core Your core stomach muscles are responsible for keeping your body in a tight position during the back handspring.
Three Important Terms for Back Handspring
It is important to remember three key terms when discussing back handsprings and their variations:
- Block. This refers to the bounce or popping of your hands when they touch down after a handspring.
- FlicFlac. Another term for a handspring is Flic-Flac.
- Yurchenko. A vault (and vault group) that starts with a roundoff entrance onto the springboard. It is then followed by a back handspring onto the vaulting tables and a flip of the table. You can add a twist to the route between the springboard or the table.
Back Handspring Drills
Drill 1
We recommend that you use a folded-up panel mat for your first drill. Any solid, raised surface can be used. In this instance, the panel mat will be used. The panel mat should be placed behind the athlete, about six inches from their heels. The athlete should swing their arms back and sit back as if doing a back handspring. Next, they should throw their arms up to their ears and jump backward onto a mat. After they have made it up, ensure they rebound from the first jump.
How this drill works: Learn what power is required to get onto the mat. To successfully perform a back handspring, they will need at least this power. Some athletes are nervous about going backward. They can learn this feeling without having to invert their bodies. You can then check that they are in the correct position by checking their swing, sit, and throw.
Drill 2
This drill is all about the arms. This drill is best done on a cheese mat. It is crucial to place your arms correctly during a back handspring. It is important to place your arms right beside your ears. This can cause injury and shorter back handspring, which isn’t enjoyable to watch or throw.
This drill has two parts:
- Lay the athlete so that their shoulders are above the cheese mat, and the rest of their body is flat. Keep their feet still so that they don’t fall off the edge as they practice their swing/throw. With the core engaged, place your arms straight up at the sides. Next, the athlete should swing their arms behind their ears and create a slight arch to reach the ground. Then, snap back to their original plank position. You can do this three more times.
- Next, transfer the athlete to the middle area of the cheese mat. Begin by having their arms straight at their sides. Next, instruct them to raise their arms high above their heads until they touch the cheese mat. Then whip them back down onto the mat. Do this five times quickly.
This drill can be repeated three times.
https://www.youtube.com/watch?v=e33eiAQeKRI
How this drill works: This drill requires your athlete to know exactly where their arms should be. They will also learn how to throw a back handspring with speed and power by using this drill.
Drill 3
Your athlete should face the wall, and be about two feet from the wall. Once they’re ready, have them stand on their toes. Keep their arms straight and have them push off with the shoulders. Their elbows should not be bent! After they have pushed themselves away from the wall push them up with their straight arms until they are able to pull their straight arms towards the wall.
This drill works: Blocking, which is an important part of a back handspring. However, many cheerleaders are not strong enough to effectively block. While this drill teaches them how to block, it doesn’t put them in an inverted pose.
Exercises that you can do at home:
These exercises can be done to strengthen your muscles to be able to do a back handspring practice. The best thing you can do at your home to learn a new skill is to strengthen your muscles.
Wall Sits To make your body look like a chair, place your back against a wall. Your knees should be bent and your calves and thighs should be parallel to one another. You should hold the position for between 30 seconds and 1 minute. This exercise will strengthen your legs, your quads, and hamstrings.
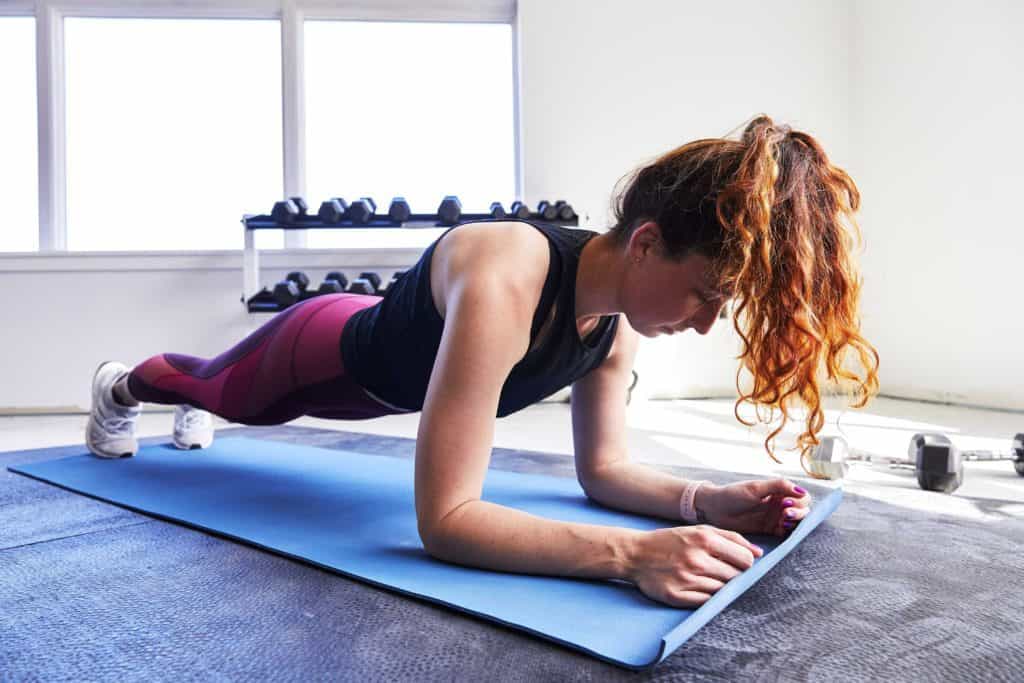
Planks Get into a push-up position by squeezing your core and squeezing your legs tightly. Your shoulders should be over your wrists. Either hold your plank on your hands or lower your arms to your forearms. Keep your head neutral. Your head should remain neutral. Planks can strengthen your back, shoulders, and abs.
Hollow holds: A hollow hold is similar to a plank, but your arms are further in front. To do a hollow hold, get into a push-up position. Move your feet and arms further away so that you’re in a tight hollow position. Keep your arms tightly between your ears. Keep your legs straight and your bottom should be squeezed. This is demonstrated in the video at the beginning.
Squats To do a good squat, place your feet at hip-width and your arms at your sides. Push your hips back as low as possible and transfer your body weight onto your heels. To balance, raise your arms. Your knees should not extend past your ankles. Point your toes forward. Next, slowly stand up again. Do them in sets of 10. Squats can help strengthen your quads, glutes, and hamstrings.
Squat Jumps – To perform a squat jump stand with your feet hip-width apart. To jump up, lower yourself into a squat and push your toes and ankles through the ground. Slowly lower your body into a squat after landing your jump.
Sumo Squats –Sumosquats look similar to regular squats, but your legs are further apart and your toes point slightly out. Standing with your feet slightly wider than shoulder width apart, your toes at 45 degrees angle, place your feet on the ground. Do a regular squat. Lower your body by pushing your hips back, and then bending your knees. Your heels should support the weight of your body. Slowly stand up. Sumo squats will strengthen your quads, hamstrings, and glutes.
Push-Ups: Push-ups strengthen your upper body, arms, and shoulders. For arm strength, you can do pull-ups or chin-ups using a pull-up bar. Pull-ups are done by holding the bar with your fingers in front of your body and pulling your chin up over the bar. Chin-ups are done with your fingers facing your body.
You can strengthen your core muscles and practice an arch/hollow hold on a pull-up bar. Your body will change from an arch-like position to the handstand as your body snaps down. If you want to do arch/hollows with a pull-up bar, hold the bar slightly arched. Keep your core, legs, and butt tight. Next, move your body into a slightly hollow position. Make sure to squeeze your core, butt, and legs. Continue doing this. Do 10 reps at once. This exercise can be seen in the video.
Wall Angels Your back against the wall, your arms elevated above your head. Your arms should be lowered to the side and then raised again. Repeat the process 10 times.
Leg Lifts. Place your legs flat on the floor and lay back. Your legs should be straight above your waist. Your arms should be behind your head. Now lower your legs towards the floor and push your lower back into it. Your legs should be lowered as far as possible so that your back doesn’t arch off the floor. Then, lift them up again. Continue the process. Repeat the exercise until you can mimic the motion of your legs crossing your head while your back handspring is supporting your body.
Also, you can do different exercises with a balance beam of different sizes or kids balance beam.
F.A.Q.
What is the world record for most handsprings?
The 57 records for consecutive handsprings by males were set by Ozell Williams (USA), at Folsom Field, Boulder, Colorado, USA on 23 November 2013. Ozell is part of the University of Colorado’s cheer squad. His attempt occurred during a quarter break at one of the Colorado Buffaloes games.
What are back handsprings?
Back Handspring – this is a tumbling move in which a gymnast jumps from one to two feet and then falls backward onto his hands before landing on his feet.

