It is important to learn beginner gymnastics skills in order to be able to perform more advanced moves later. Although some blogs claim that the back walkover is a beginner skill, we believe that this is a bit too ambitious. This blog was inspired by Gymnastics Canada’s evaluation program. It outlines 11 movements that are aimed at beginning gymnasts.
As with all competitive sports and activities, it is a good idea to start young in order to build the skills and discipline necessary for a lifetime of the competition. This is especially true in gymnastics. A serious gymnastics program should be started at 5 years of age. Very few gymnasts start too young.
Gymnastics includes not only tumbling on the floor but also balance beam, vault, bars, and vault moves. The standard curriculum will include strength, flexibility, and dance skills between the ages 5 and 7.
Level 1 is the first level of gymnastics in the JO program. This means that competition at level 4 is impossible for most gyms. A gymnast between the ages of 5 and 7 will typically be at level 1 or 2. This is due to the time required to learn the skills and meet the USAG requirements. A 7-year-old could be able to start level 3.
Beginner Gymnastics Skills For Kids
These beginner gymnastics skills include movements that occur throughout a gymnast’s development and across different apparatus.
1. Bridge
Gymnasts need to be able to do the bridge. It is an essential skill in gymnastics.
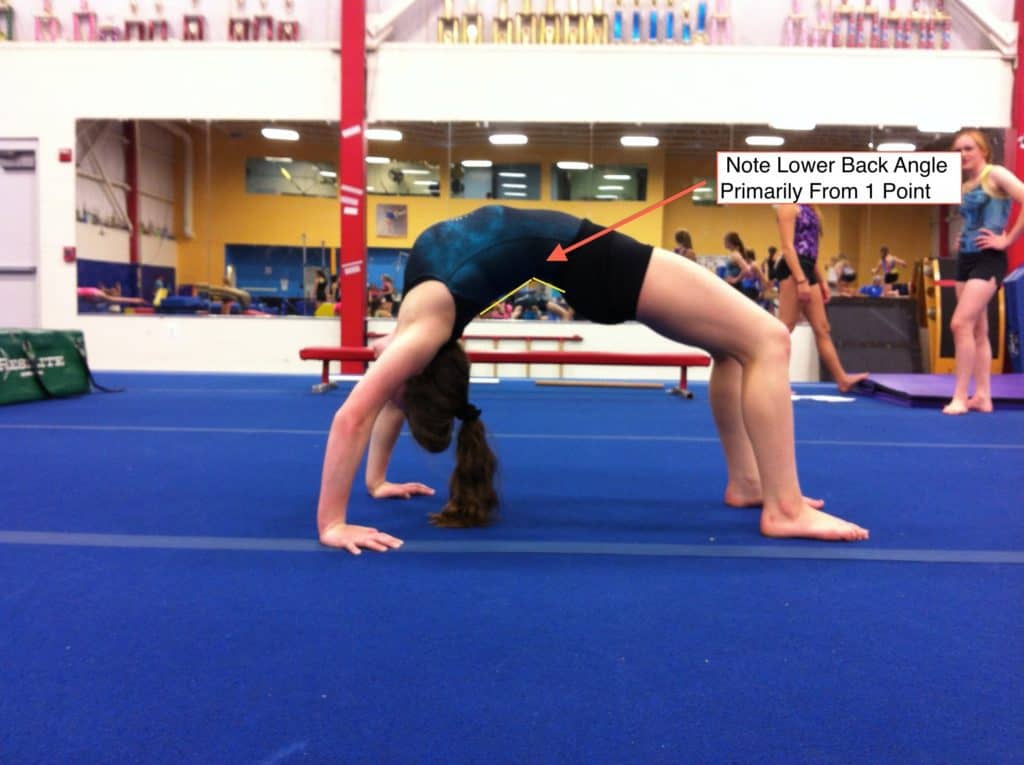
Although the bridge isn’t technically a gymnastics move and it is not something you will see in competitions, it is a stretch that strengthens the core, hamstrings, and glutes that every gymnast should learn as soon as possible.
When you first learn how to do a bridge, you should lie flat on your stomach with your knees bent. Your hands will be by your ears and your palms facing the ground. Next, push your body upwards until your feet and hands are flat on the ground. Then arch your back as far as you can.
This is the best position to start if you’re just starting out. Once you have reached this point, you can straighten your arms and legs. Next, lift your shoulders while your head tucked.
From the shoulders to the wrists, the correct position should be straight on the ground. The fingers and toes should also be aligned with the body. To help young gymnasts get to this point, they can first use a stack of mats to place their feet. They should aim for the perfect bridge, but not push too hard like any other gymnastics move.
A gymnastics barrel is a useful tool that can help you here. This is an octagon-shaped shape that you can bridge over to support your back. Once you have gotten this position, you can move into a bridge position by simply putting your top body backward to place your hands on the ground.
2. Straddle Sit
The straddle sitting familiarizes gymnasts to a position that can be used for jumping on trampoline, beam, and floor. You can use it as a transition skill on vault, rings, bars, or isolated skills. Young gymnasts may find it very helpful to learn a strong straddle sitting because of its popularity.
How to do straddle sitting: Gymnasts need to sit straight up on the ground with their feet in front. To help them balance, they should place their hands on the ground and stretch their legs until they feel comfortable. Toes should be pointed and legs should be flexed.
If a gymnast is performing a straddle, their knees should face up and not roll inward. You can raise your chin and extend your arms straight up, or you can keep them parallel to the ground as shown in the image above.
3. Forward Roll and Backward Roll
Forward and backward rolls are essential for many gymnastics skills. They can be used to help you learn more advanced moves. These are the most important gymnastic moves that a 5-7-year old can master.
A young gymnast’s first move is the forward roll or roly-poly as it is also known. The forward roll can look like a graceful somersault when done correctly. You can execute a perfect forward roll by moving from a standing position to rolled position and back to standing without using your hands.
If you’re trying to master this skill, it will take practice to be able to stand up straight without using your hands. These steps will help you achieve a perfect forward roll. To get in the right position for a perfect roll forward, you must stand straight up and have your hands pointed toward the ceiling.
Your arms should then drop straight in front of your body while your knees are bent. Then, place your hands shoulder-width apart on the ground. Keep your fingers in front and your chin on your chest.
Next, move forward in a rocking motion and keep straight legs. Then, transfer your weight onto your shoulders by moving your arms. You should be able to place your feet on the ground by rocking again, but this time with a rounded back.
It is a good idea that you look at your belly button as you roll so that your lower back touches the ground instead of your head. This can help to reduce pain. To balance, your arms should not be extended in front of yourself when you get back up. To finish, your arms should be in a tuck position so that your hands are again reaching towards the ceiling.
The reverse of the roll forward, the backward roll requires that you start in a standing position with your hands facing the ceiling. Next, place your legs and feet together in a squatting/sitting posture.
Your arms should be dropped so your elbows are bent and your hands should be palm-up next to your ears, with your fingers facing forward. You should tuck your chin in and wrap your back around like a cat’s back. Next, roll your shoulders backward.
When your hands touch the floor, push your feet off the ground as hard as possible. Then, straighten your arms and continue rotating your head completely above your head. You should place your feet on the floor in a squat, pike, or crouch position. Finally, you should point your hands towards the ceiling.
There are two important points to keep in mind when performing backward rolls. It is important to keep your back straight when performing the backward roll. Also, remember to push off with both your hands.
4. Log Roll
Log rolling is a unique movement that children won’t see in their daily activities. Log rolls require gymnasts to roll over and not be able to see the floor. They gain confidence in moving confidently towards a blind landing. This skill will be used with movements such as the front roll.
How to make a log roll. The gymnast must lie flat on their back, with their arms crossed over their heads and their toes pointed. They should lift their arms and legs slightly off the gymnastics mat to create a hollow or concave body shape. Then, roll onto their stomach. The gymnast should then roll backward. For some gymnasts, it may be easier to generate momentum by moving with their hips.
It is important to keep your ankles pressed together and your body flexed during this movement.
5. Safe Landings are Possible
A hop to a safe landing is a way to learn the mechanics and safety of landing safely. The gymnast must be able to land with their head straight up and their feet flat on the ground. This also requires that the gymnast bend their knees in order to absorb impact. Gymnasts should not jump off the platform higher than their level.
How to jump to a safe landing: Gymnasts must perform a two foot jump from a raised platform. They should land with a two foot landing. After absorbing the impact of landing with bent knees, they can extend back to a standing position.
6. Cartwheel
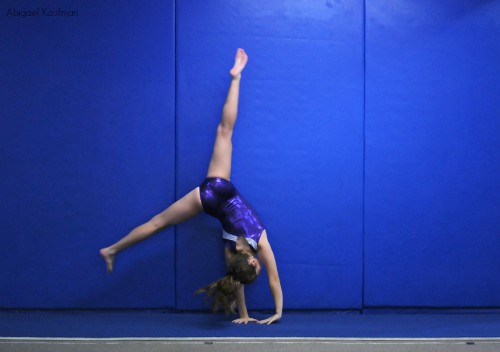
Many people recall doing cartwheels at recess in grade school, but they aren’t the same as those that gymnasts do. Fun fact: The cartwheel is named after the way the gymnast’s arms, legs, and hands move while performing it.
To be able to perform this move, stand tall with your hands facing the ceiling. The next step is to move into a lunge by moving your dominant leg forward, and then bending it slightly. Ensure that your back leg remains straight.
Your arms should be extended straight up above your head, just below your ears. Next, place your hands side-by-side and align them with your front leg. Keep in mind that you must turn your head 90 degrees when you are on the ground.
Next, kick your back foot above your head and then follow closely with your front foot. You should kick your front foot first, and then the foot on the opposite side. It should be in a lunge position, with your arms crossed near your ears. Your front leg should be bent and the rear straight.
Also, your chin should be raised. To master the cartwheel, practice by allowing your legs to move to the sides of your body. This move should be executed quickly. You should not pause or hesitate while performing it.
7. Consecutive Jumps
It is a great way for kids to learn how to absorb the impact of landing. The next step is to practice consecutive jumps. Gymnasts can practice jumping with their feet together, landing with their feet with two feet, and then jumping again. This springing movement is crucial for gymnasts to learn advanced movements such as round-offs, back handsprings, and other complex moves later in their development.
How do you perform consecutive jumps? Gymnasts stand straight on a trampoline or floor and bend their knees to lift themselves into the air. Once they are back on their feet, they should be able to spring up again. Gymnasts should be capable of landing 5-10 consecutive jumps without difficulty, landing correct form, and then quickly springing into the next straight jump.
8. Backbend Kickover
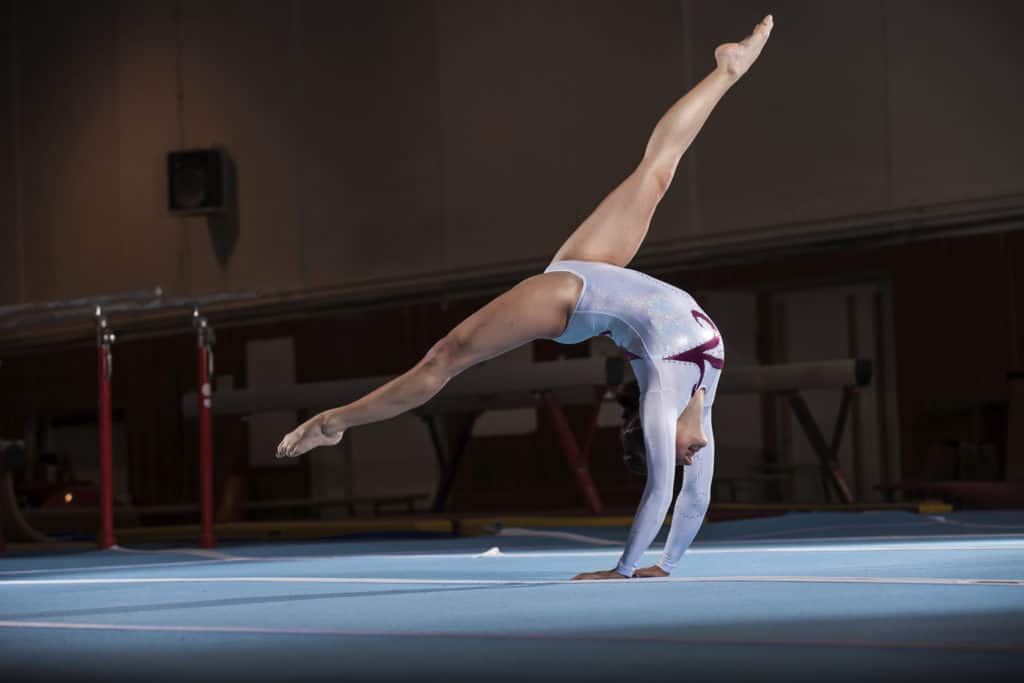
The backbend is a move that can be seen on floor routines or on the beam. It involves the gymnast bending their body backward to create a U shape, which is very similar to the bridge position. To complete this move, the backbend kick over involves elevating the legs above the head and landing in a lunge position.
First, you must do the backbend. Start by standing tall with your arms crossed over your head, and then stretch your hands towards the ceiling. Look up at your hands and bend in a “U” shape, until your hands touch the ground.
After you’ve completed that part, don’t pause even for a second before moving on to the kicker. To do this, you will kick your head with your dominant foot. The other foot will follow closely.
To return to the starting position, you must land it in a lunge on the opposite side. A stack of mats or a barrel can be used by a young gymnasts to support their feet while they learn how to do a backbend kickover.
9. Tuck Jump
To tuck jump, gymnasts must have enough power to create a tuck position mid-air and then extend their legs to land on a soft surface.
How to do an a-tuck jump: Gymnasts must stand straight and keep their arms above their heads. To generate power, they should bend their knees and bring their arms to their sides. Next, they should lift their arms above their heads and spring up. Gymnasts should bring their knees towards their chest as they approach the top of their jump. Then, bring their hands to their knees and form a tuck position mid-air. After achieving the tuck, they should lower their legs to absorb the impact of landing on the ground. They should then extend their arms back and let their arms fall over their heads.
10. Jump Half Turn
Gymnasts learn how to jump half-turn and trust their ability to land backward. This skill is essential at every stage of a gymnast’s growth.
How to perform a jump half-turn: Gymnasts must stand straight and keep their arms above their heads. They should bend at the knees and bring their arms to their sides. To generate power, lift the arms above the head and spring up once the legs are fully loaded. To initiate rotation, the athlete should rotate their shoulders as they spring up. To complete the half-turn, gymnasts should stop rotation and bring their chin to the center. Next, they will land on their knees and absorb the impact by bringing their arms straight up.
11. Round-Off
The round-off, which is similar to a cartwheel is another top move in the young gymnast’s arsenal. This is especially because it is the gateway for most floor tumbling passes and a large number of vaults.
The landing with two feet at a time is different from the cartwheel. It is done facing the direction you started from, and not the opposite. You must first stand tall and raise your hands in order to start the round-off.
You can now move into a lunge position by placing your dominant leg forward, bending your back leg slightly, and putting your dominant foot in front. At this point, your arms should be straight above your head but close to your ears.
To get forward momentum, place your hands on your front legs and your hands should be side-by-side. Your hands should be 90 degrees to the ground when you do this.
Next, kick your back foot over your head and then your front foot. Then you will be able to lunge. Your hands should support your entire body weight. For a brief moment, you can hold your legs in a handstand position by pulling your legs together.
This should be done high up and not in the back. While your legs are dangling high up, rotate your hips 90 degrees. Once you’re done, your hands will lift off the ground and your feet should touch the ground.
Your body rotation should stop when you are looking in the same direction as the round-off started. Your knees should not be bent when you land. Young gymnasts may not be strong enough to do a round-off by themselves. Stacked mats can help them build strength and teach the form.
12. Tripod
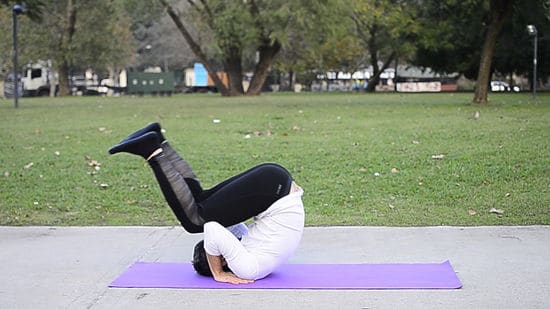
The first step to learning how to do a headstand is to achieve a balanced tripod. You can combine it with a front roll (ie, tripod to front roll out) to show gymnasts how safe to exit from inverted positions while going off-balance.
How to make a tripod: A front roll is similar to a gymnast bending at the knees to place their hands on the mat. A triangle with three points between the gymnast’s hands and the mat is the key to creating a tripod. The triangle’s base and third points of contact are the hands and the head. The gymnast should lean forward with their hands on the ground and place their top head on the mat. This position should allow the gymnast to balance for at least three seconds.
13. Back Handspring
This is a reverse flip from a standing to a standing position. The hands touch the ground halfway through the flip, then the feet touch the ground again. This move is often part of a round-off.
It is crucial to have a spotter when performing a back handspring, especially if you are just starting out. As a stand-alone movie, the back handspring should be performed with your hands facing upwards toward the ceiling.
Next, bend your knees as if you were sitting in a chair. Then push your toes through the ground and let your shoulders drop until your hands touch concrete. Next, place your legs over your head while your feet are still together. Then lift your hands up and return your hands to your chest.
Important to remember that a young gymnast must be able to perform a round-off and backbend as well as bridge and backbend kick over before they attempt a back handspring. Although this move may look similar to the backbend flip over, the back handspring requires your hands to touch the ground before you can touch your feet. With the other hand, your feet should touch the ground just a second before your hands touch the ground.
14. Pullover
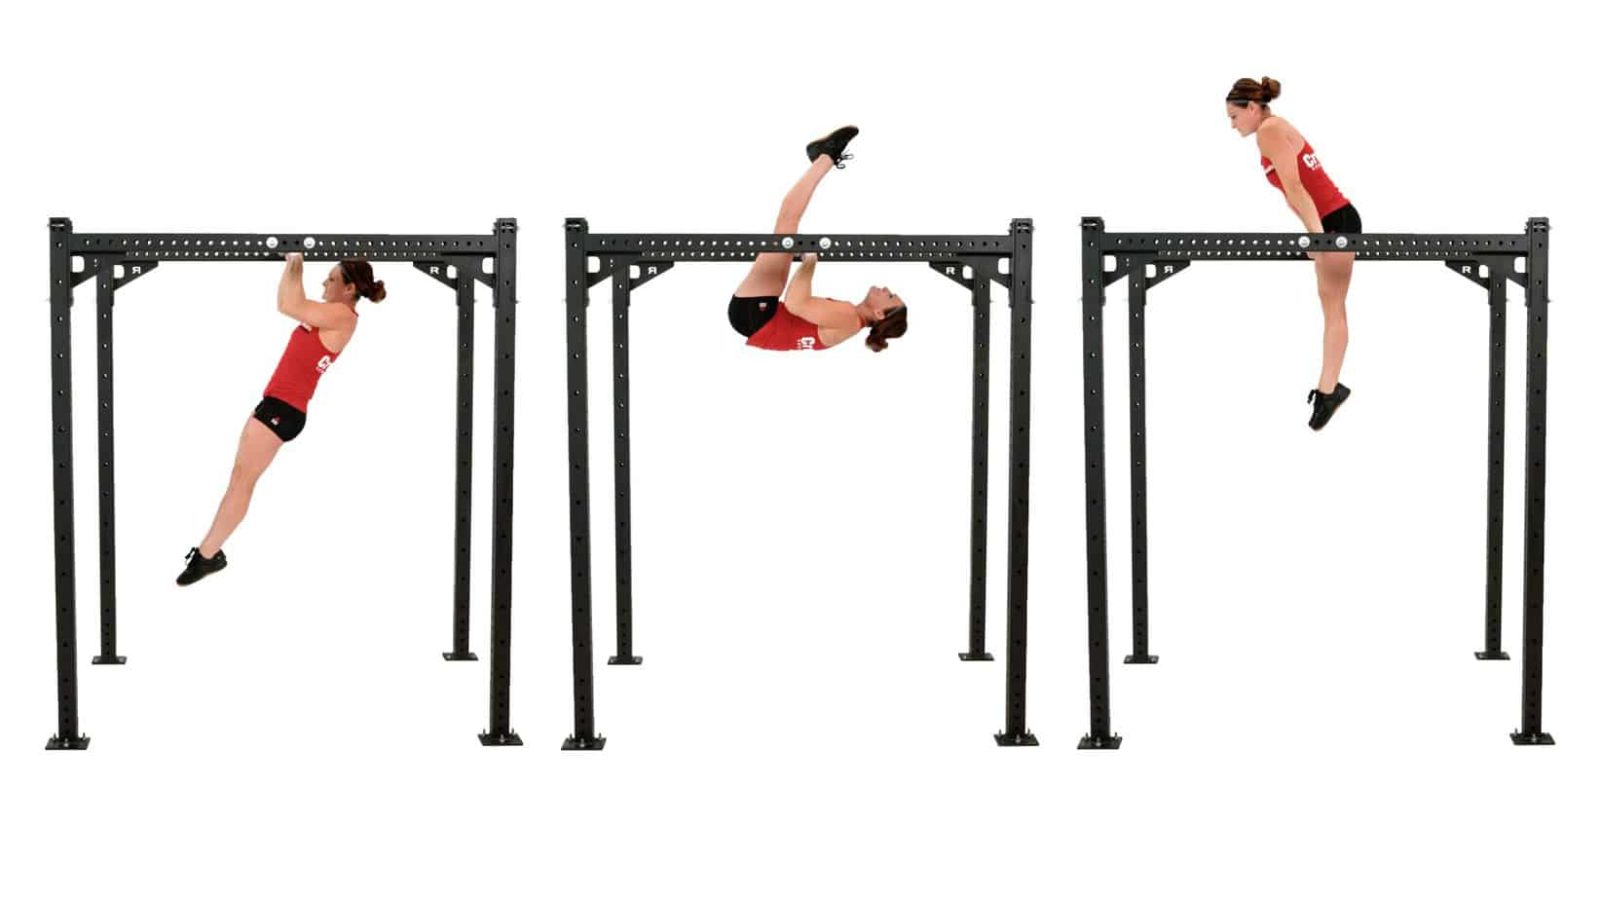
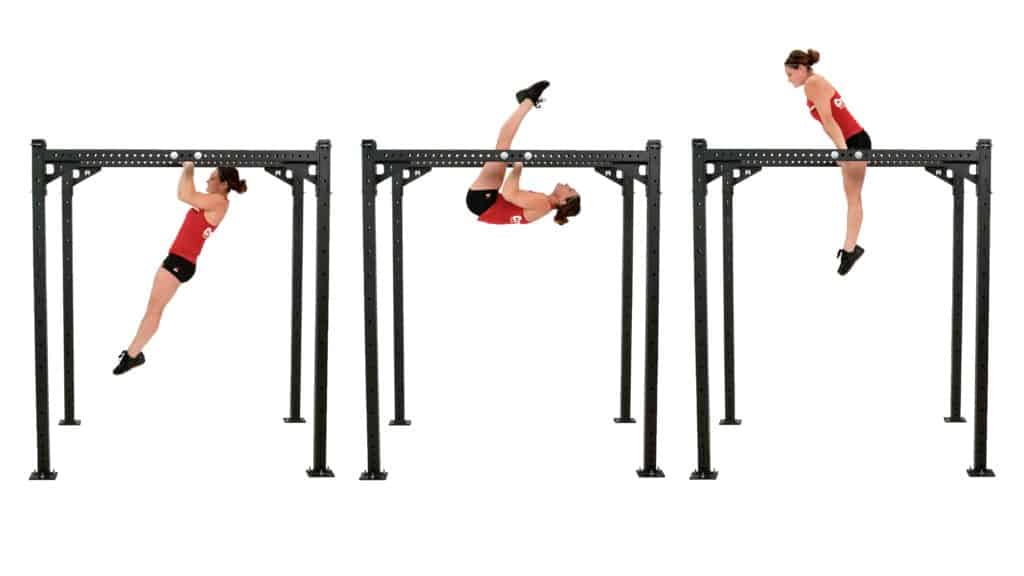
When young gymnasts begin their training on the bars, a pullover is a type of somersault move. Pullups and v -ups are great for strengthening the muscles required to pullover.
This gymnastics move requires you to reach the bar with your hands and grasp it with your thumbs. Your hands should be at shoulder width and your feet should be positioned close together, not under the bar.
Next, take a step forward using your weaker leg. Your dominant leg should then be kicked up and underneath the bar. As the kick propels your body upwards, your toes and legs should be pointed straight.
Your body will rotate over the bar as you move your legs. Keep your legs straight and the bar should be between your hips. To ensure a straight finish, your wrists should rotate while you move around the bar.
After you have completed one complete rotation, straighten your arms. Your torso should be elevated diagonally above the bar with your arms straightened and your legs straightened. A young gymnast should stop in the final position before dismounting.
While in rotation, it is a good idea to keep your head down and watch your legs from the other end of the bar. If your legs are coming down on the opposite side, the rest of the body should follow.
15. Back Hip Circle
Another gymnastics move that can be performed on the bar is the back hip circle. You will need to know how to cast a back hip circle. To start, you must be at the bar. The bar should be at your hips. With your legs extended toward the chest, your chest should extend above the bar.
Keep your hands still on the bar and your legs should be straightened so that your body is horizontal. Your legs should be in a horizontal position. Now, you can propel your body around the bar by moving your legs forward quickly.
Keep your legs straight and your toes pointed forward. After the circle is completed, you have two options: either you can pause and continue into the next circle or take a glide swing to dismount. Finally, stick your landing.
16. Handstand with Flat Back
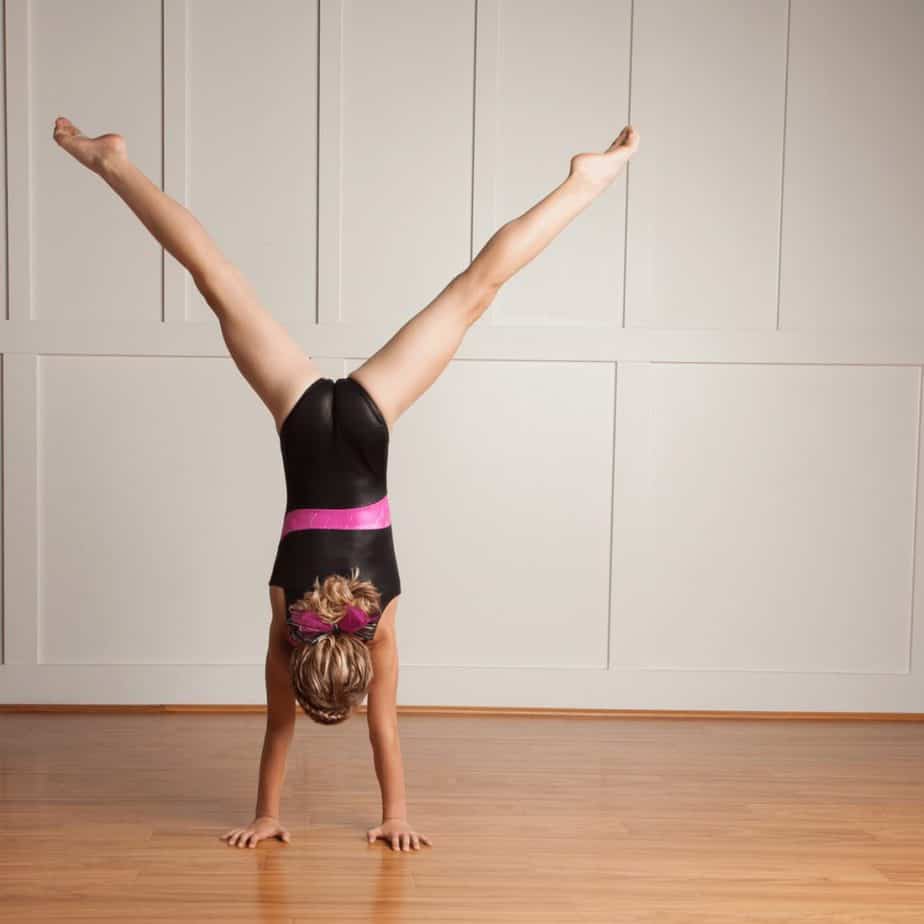
Handstands are a fundamental part of gymnastics. Like most gymnastics moves, it takes patience and time to master. To perform a handstand with a flat back, the gymnast should begin in a lunge position with his hands facing upwards. The dominant leg should be in front.
This tip is to make sure your knee doesn’t cross the ankle. Next, lift your legs high and do a handstand. You can then hold your body straight once you have reached vertical by pushing your shoulders and pulling your toes towards the ceiling.
To finish, lower one leg at a stretch and then lunge forward with your hands pointing towards the ceiling. There are many things you can do when learning how to do a handstand.
To practice a handstand, one option is to use a mat or wall to help you. You can use this to support you in your handstand position so you can gain confidence and the necessary muscles to do a proper handstand.
17. Balance Beam Handstand
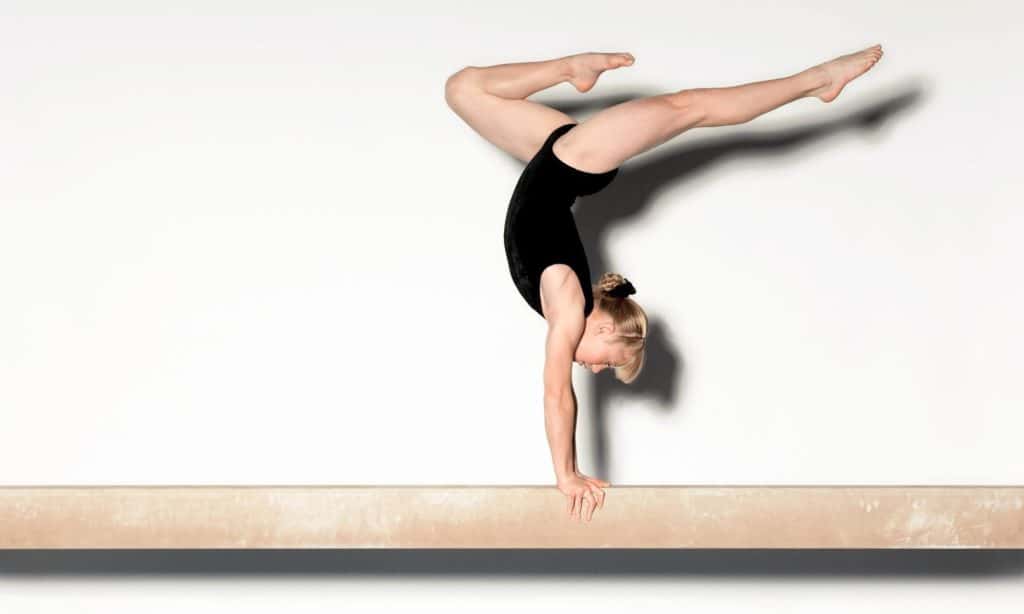
While the handstand on the balance beam is similar, the way you do it will be different. This handstand requires a bit more practice because the beam is 4 inches wide, approximately 16 feet long, and 4 feet above the ground.
To do this, you must sit down and face the beam. Your hands should be in front of the beam. Next, place your arms in front of the beam and your elbows in between your legs. Now arch your back so that your weight is not being supported by the beam.
Your legs should extend out from there, extending your legs straight up to the sides. The beam will not touch your legs. Your weight will still be held by your hands. At this point, your head should be lowered to the beam and your feet should point up in the air.
Continue moving until you are in a standing position with your feet pointed straight line up to the ceiling. While your shoulders are in line with the beam, you should face the beam from the side. After a while, lower your legs in the opposite direction to how you went up.
You will need to raise your head and then split your legs to wrap your arms around. This gymnastics move can be done on the balance beam, but it requires a lot more muscle.
This is usually done on the floor beam. It is usually a balance beam that is several inches above the ground. Sometimes, the floor beam can be placed against a wall to support the handstand. The next step is the balance beam, which is easy to use once the floor beam becomes second nature.
While attempting to do the handstand on the beam, a young gymnast will be observed. They will be allowed to practice the handstand once they feel confident. However, since this is the first thing a young gymnast learns on a beam, most gymnasts aged 7 years and older can do it without any assistance.
Toddler Gymnastics at Home vs. Gymnastics Classes for Toddlers
Are you afraid that toddler gymnastics classes can make your life difficult? Did you know that many toddler gymnastics instructors at gyms have little or no gymnastics training? However, it is not difficult to find affordable and high-quality classes for toddlers.
You might be able to find a class that you like, if not, great! You don’t have to deny your child the many benefits of gymnastics for kids! Gymnastics for toddlers is easy and fun at home. You can teach your child gymnastics right at home. The gymnastics moves for children below are the same ones that kids learn in a preschool gymnastics class.
It is possible to learn how to teach gymnastics at your home. Start with the activities for toddlers.
You can have a gymnastics coach teach your beginner gymnasts online if you prefer. The multi-class course will allow them to learn at their own pace, with minimal or no assistance from you.
Kids gymnastics equipment and Gymnastics mats can make kids’ gymnastics more exciting and fun, but they are not meant to replace outside time. Your toddler only needs you to be engaged and these toddler gymnastics skills will be something they love to do with you.
F.A.Q.
What are beginner gymnastics moves?
These are the basic skills of beginner gymnastics. They include movements that occur throughout a gymnast’s development across different apparatus.
1) Straddle Sit. 1) Straddle Sit.
2) Balance on one leg 2) Balance on one foot
3) Safe landing, hop to it. …
4) Log roll. …
5) Consecutive jumps. …
6) Forward roll. …
7) Jump half turn. …
8) Tuck Jump…
And some others.
What are the 10 Beginner movements in gymnastics?
Basic Gymnastic Moves
Forward Roll. Start position: The hands should be pointed toward the ceiling and your body should be upright. …
Cartwheel. The move begins in a high stance with one foot in front of another. This move is…
You can also roll backward. This move begins with a tall stance. This move is…
Handstand. Handstand.
Bridge. Bridge.
Back Bend/Back Bend Kick Over.
What are the 8 basic skills in gymnastics?
The basic skills needed for a gymnast include flexibility, core strength, and balance, as well as power and mental focus. While commitment is not a requirement, it is a necessary skill that is often evaluated by coaches.
What should a 7 year old gymnast be able to do?
Gymnasts will learn vault, rings, floor, pommel horse, bars, rings, and pommel horse. This will allow them to develop a range of skills and increase strength, flexibility, coordination, and coordination. Skills include the following: round off, cartwheel, pull over and tap swings. The class ratio is around 8:1.

